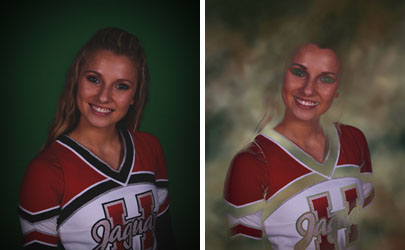
The key to great results with Chroma-key backgrounds is good, consistent lighting. The examples below illustrate different lighting and exposures and the results. All of these images were processed with the default settings in Darkroom Booth photo booth software. The same results would be achieved and the same techniques can be used with Darkroom workflow software, Core, Pro and Assembly.
This is an example of good lighting and exposure for green screen. The green is the proper color for Chroma-key and it is even throughout the frame. The result is a good dropout with rich color and no green halo around the subject’s hair.

In this example there is considerable light fall off in the corners so that the green drops to near black. The result is a lower contrast in the color along with poor dropout in the black areas of the uniform.

In the final example the entire image is dark and muddy with little separation between the hair and the background. Also, the green is almost entirely near black. Basically the software cannot tell what is green and what should be dropped out. The result is a completely unacceptable dropout.
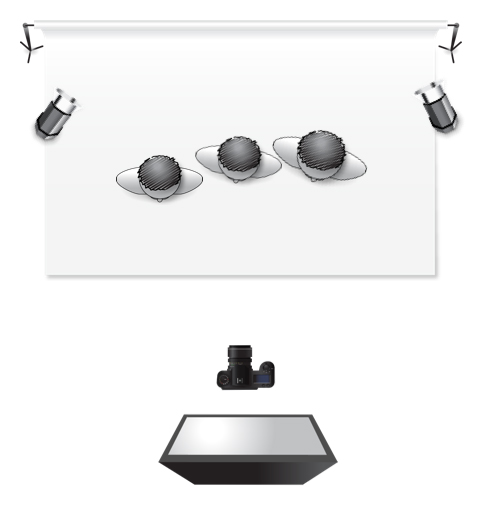
Below is an illustration of a basic lighting setup for good green screen results. There is a main light above the camera to light the subject. The subject is a few feet from the green screen background with additional lights to evenly light the green screen. This set up allows you to adjust the brightness of the subject in relation to the background and also reduce or eliminate shadows on the green screen. This is by no means the only way to light for green screen and may not be possible with your booth design.

Hopefully you found this information useful. For more information on how to use Darkroom Booth software check out our online manual.

