Create Stunning AI Lenticular Prints Your Customers Will Love
If you’re looking for a way to stand out at your next event, combining AI with lenticular printing might be one of the most exciting options available in Darkroom Booth right now.
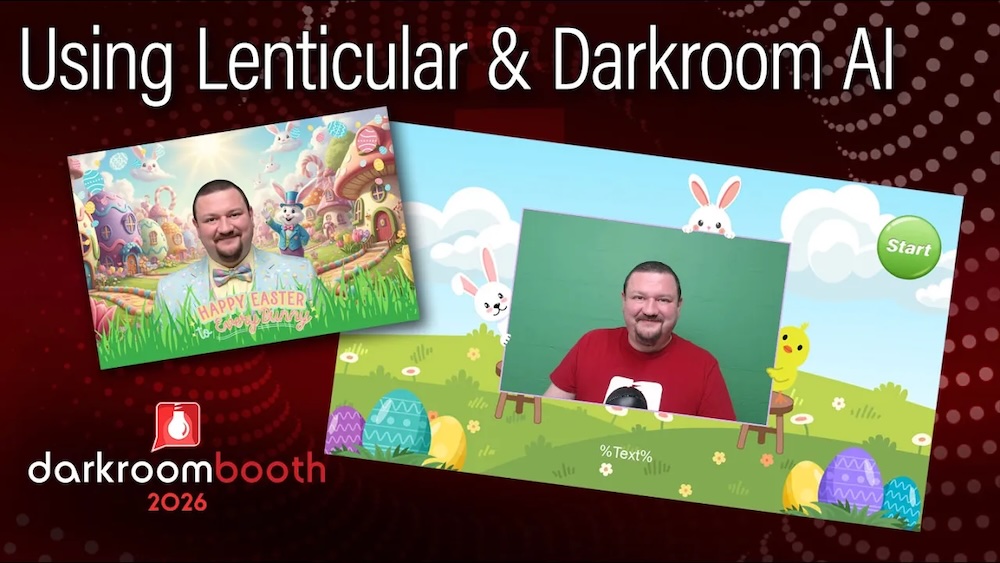
In this quick tutorial, Eugene walks through how to create a dynamic, flipping lenticular print that transforms a standard photo into an AI-enhanced experience—perfect for themed events like Easter, holidays, or branded activations.
Let’s break it down.
What Is an AI Lenticular Print?
A lenticular print creates the illusion of motion or transformation when viewed from different angles. In this workflow, you’re combining:
- Original photo capture
- AI-generated version of that photo
- Interlacing technology and a lenticular lens for the flip effect
The result? A print that literally changes in your customer’s hands.
Step 1: Create Your Template
Everything starts in the output template.
- Create a new template (example: 4×6 Easter Lenticular AI Demo)
- Set the orientation (typically 4×6 horizontal)
- Add your base photo
This template will control both the visual layout and the lenticular behavior, so getting this right is key. Need a template to get you started? You can download one for free from the Darkroom Help Center here.
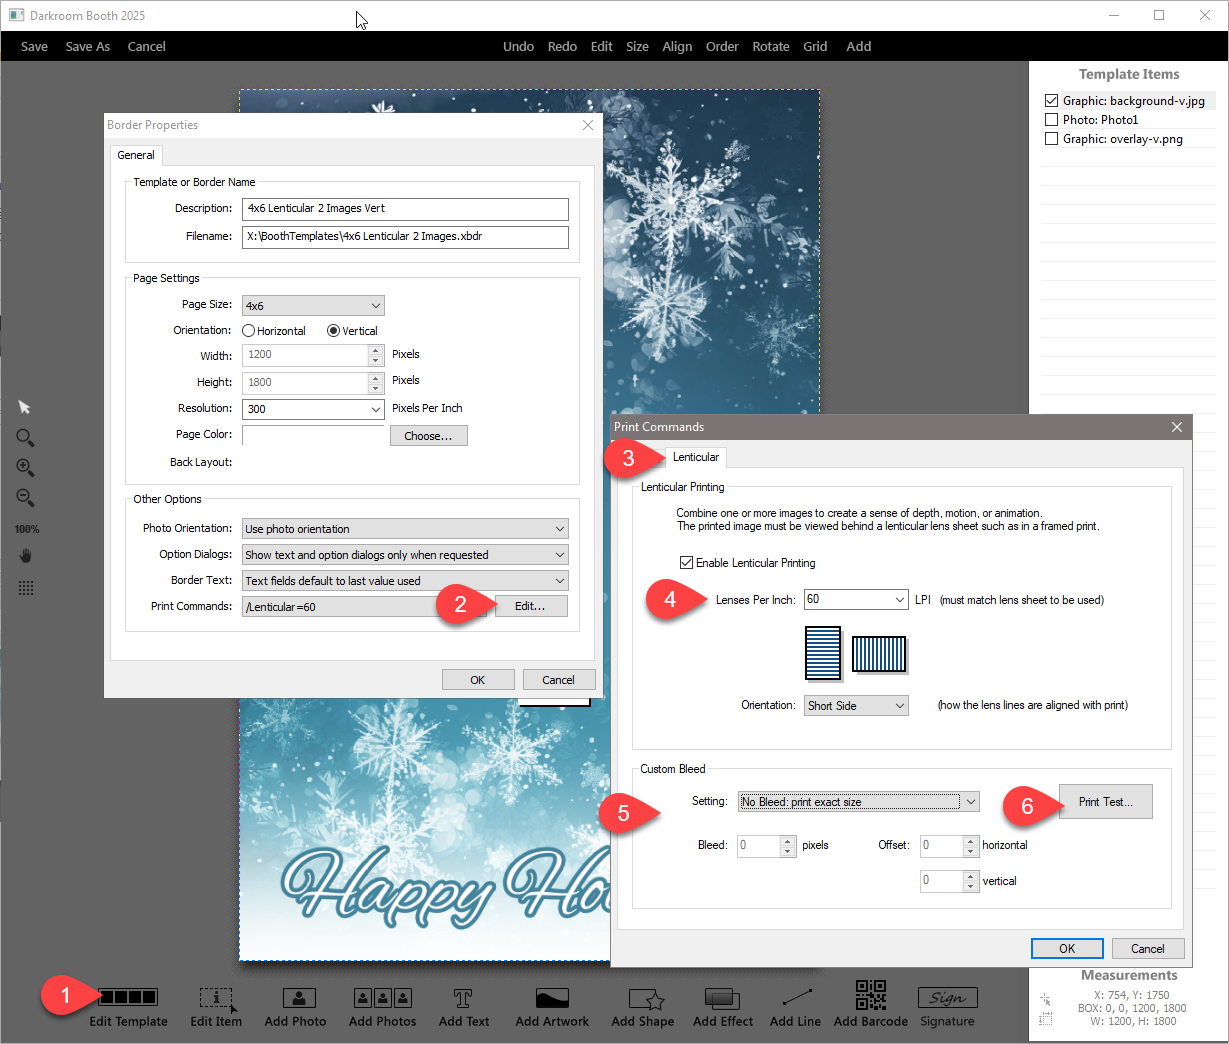
Step 2: Enable Lenticular Printing
Inside your print commands:
- Enable Lenticular Printing
- Adjust Lines Per Inch (LPI)
- Default is 60 LPI
- Fine-tune for your specific printer/lens combo
- Set Bleed to “None” for best alignment
💡 Pro Tip: Small LPI adjustments can make a big difference in clarity. Test prints are your best friend here.
Step 3: Add the AI Flip Image
Now for the magic.
- Duplicate your original photo
- Apply an AI effect to the second image
- Use a prompt like:
“Keep the same pose… dress subjects in Easter clothing… place in a magical Easter village… include a human-sized Easter bunny.”
This creates a before-and-after transformation that will be used in the flip effect.
Step 4: Configure the Flip Animation
To make the lenticular effect work:
- Original Photo → Frame 1 only
- AI Photo → Frame 2 only
Darkroom Booth will:
- Interlace the images
- Align them for use with the lenticular lens
- Print the photos
- Create the flip illusion when viewed at different angles with the lenticular lens applied
Step 5: Add Overlays (Optional)
You can enhance your design with PNG overlays:
- Event branding
- Themed graphics (Easter, holiday, corporate)
- Custom frames
Set overlays to:
- Always visible (static), or
- Assign them to frames if you want them to animate as well
Step 6: Capture, Process, and Print
Here’s what happens during a session:
- Capture a single photo
- Generate the AI version (~20–30 seconds depending on internet speed)
- Interlace the images
- Print the lenticular result
- Apply the lenticular lens
The final product is a physical print that transforms from the original image to the AI version when tilted.
Lenticular lenses are available from Imaging Spectrum
Why This Works So Well at Events
This feature checks all the boxes for modern photo experiences:
- ✅ Highly interactive (guests love the flip effect)
- ✅ Visually unique (stands out from standard prints)
- ✅ Customizable for any theme
- ✅ Premium upsell opportunity
It’s especially powerful for:
- Holiday events (Easter, Halloween, Christmas)
- Brand activations
- Experiential marketing
- High-end photo booth packages
Final Thoughts
Combining AI with lenticular printing opens up a whole new category of creative, high-value print products.
With just a single capture, you can deliver something that feels:
- Personalized
- Interactive
- Memorable
And most importantly—something your customers will want to keep and share.
Want to try it yourself?
A sample event is available in the Help Center; you can download it and start experimenting right away!
If you have any questions or need any assistance, feel free to contact our support team – support@darkroomsoftware.com